How to use OpenType® features in MS Word
‘OpenType features allow fonts to behave smartly. This behavior can do simple things (e.g. change letters to small caps) or they can do complex things (e.g. insert swashes, alternates, and ligatures to make text set in a script font feel handmade)ʼ — Tal Leming, The Unofficial OpenType Cookbook.
Introduction
First of all, let me touch the base on what OpenType® is. OpenType® is a cross-platform font file format developed jointly by Adobe and Microsoft. It offers several compelling advantages:
- A nearly unlimited character set based on the international Unicode encoding standard for rich linguistic support
- Advanced typographic capabilities related to glyph positioning and glyph substitution that allow for the inclusion of numerous alternate glyphs — such as old-style figures, small capitals and swashes — in one font file
- OpenType advanced typographic features are supported in Adobe InDesign® CS all versions, Adobe Illustrator® CS all versions, Adobe Photoshop® CS all versions, as well as many non-Adobe applications (MS Word, Corel Draw etc)
MS Word’s OpenType support is still a bit buggy. Swash feature is not yet supported and it may take some time to get the result you need by switching of and on different features as they may affect each other. It is still a reasonably new feature for MS Word (they started support OpenType in 2010) which means we need to be patient 🙂
There are more than 100 OpenType features but you do not need to worry about all of them. First of all, lets mention those features that have to be enabled all the time in order the text to appear nicely readable.
Features that matter

Please note that in this tutorial, I am using Word 2011 for Mac. If anything look unfamiliar to you and your copy of MS Word, you can refer to Microsoft Office’s support page for instructions specific to your software.
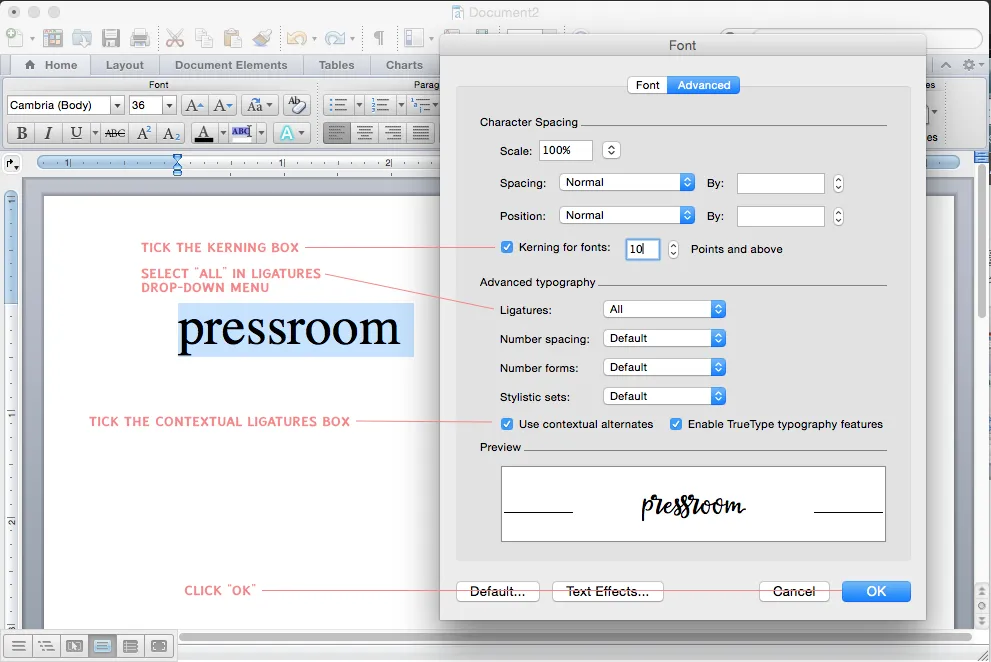
- Common/standard ligatures – for script fonts it is very crucial to have them enabled, otherwise some connections won’t look nice
- Kerning – this feature is very important for not-connected fonts — such as Sans Serifs and Serifs. It sets the distance between letters.
- Contextual alternates – important for script fonts because it affects how first and end letters look.
Step 1.
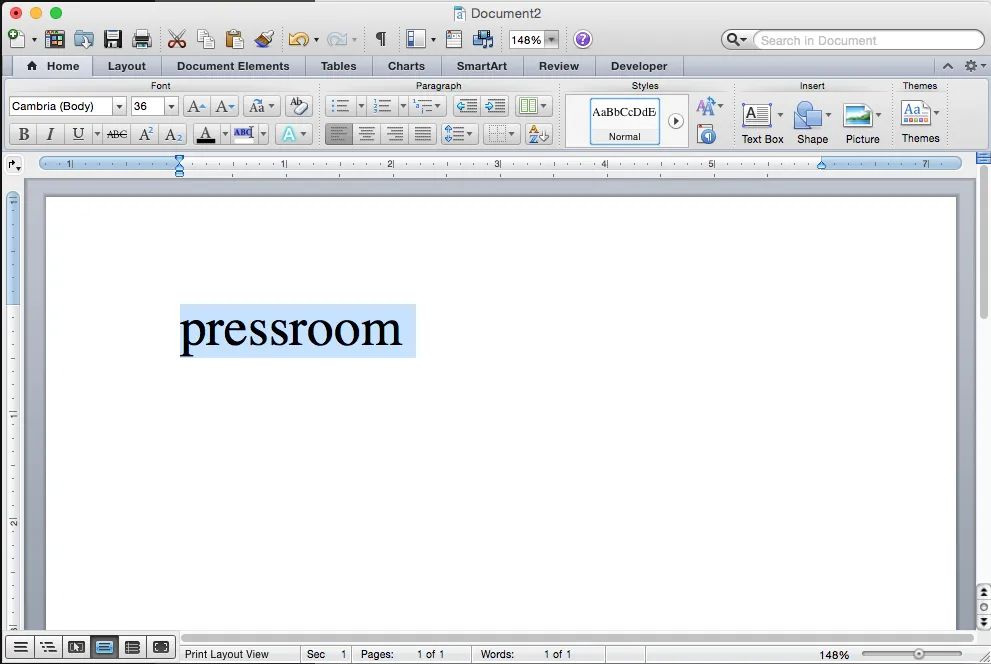
Create a New Blank Document and type any text in there.

Step 2.
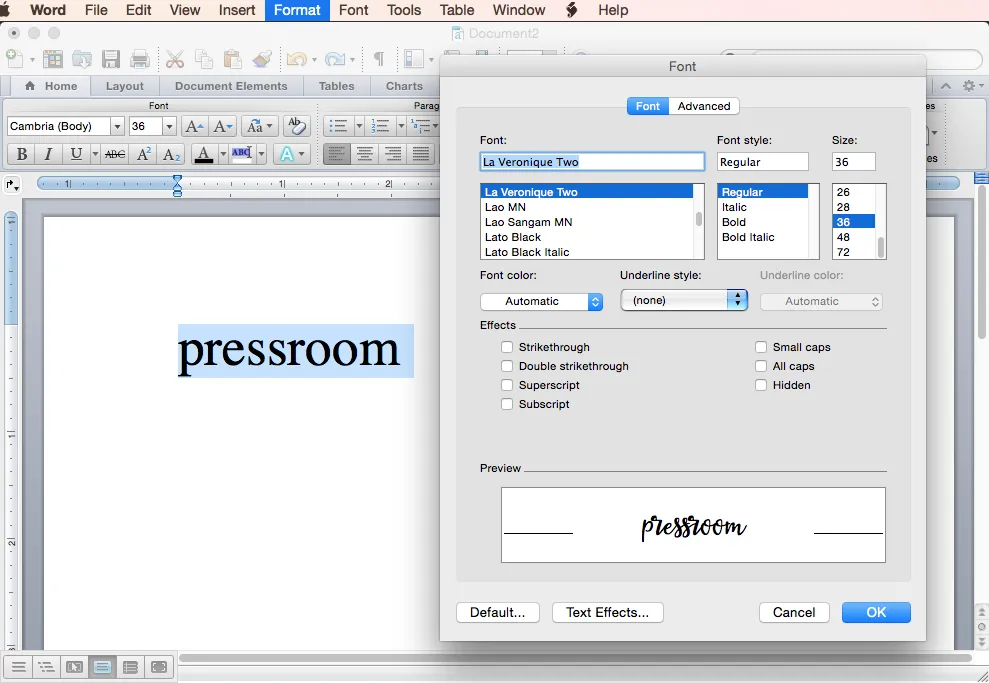
Go to Format-Font menu and select the font you’d like to use, it’s style and size.

Then go to advanced tab and select the features you need:

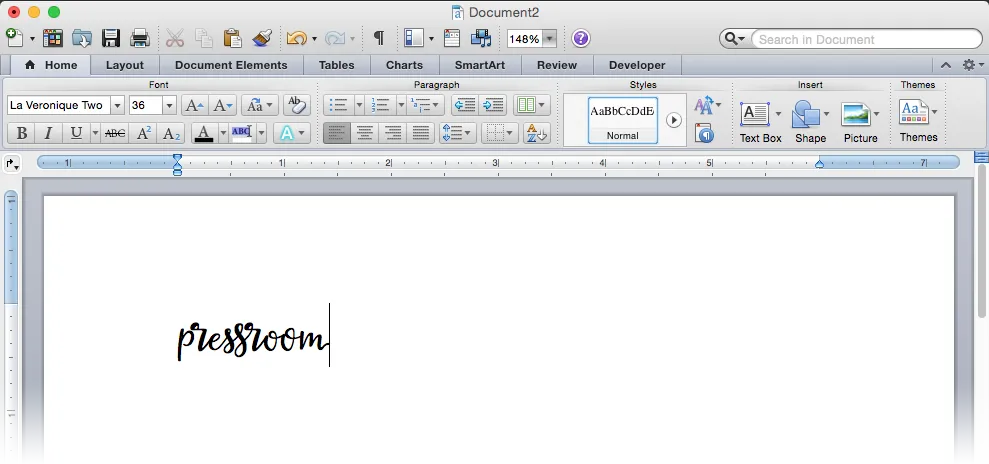
Here what we’ve got after all the magic is applied to the text.

If something doesn’t work smoothly, I would advice using Character Map (Windows) or FontBook (Mac) to select and insert the characters you need. Both applications are free and are supplied with your operating system.
You can also use a paid applications: PopChar (Windows and Mac) or Ultra Character Map (Mac only)